In 2022 you can do it for £19 and 0 minutes.
Update Looks like the market has seen the demand for these sorts of devices and made them more simple. There are a few different devices:
- No-Brand for £11/13/20 (right). No discernable differences between the units. Reviews suggest they work but they’re interesting to program.
- Inkbird ITC-310T-B for £35 (often vouchers, current is -30%). Seen Inkbird talked about a fair bit more in the wild. This gives you a cooling plug too. Spotty reviews from people getting the wrong thing sent to them.
You still need a heat source. The price of my original 1500W plate has almost tripled in price, so shop around. You probably don’t need more than a few hundred watts to hold 50°C.
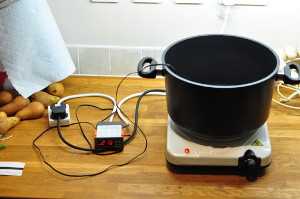
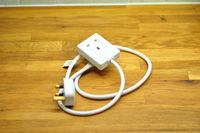
This is what we’re building today. It’s really just a temperature-regulated power socket with a hotplate plugged into it but the result is a water bath accurate to ~0.5°C that’s going to change food forever.
Cooking sous vide means being able to keep things at their optimum temperatures for the optimum time. You vacuum-pack your food, stick it in the water bath and some time later your food is perfectly cooked. And results are completely reproducible. You also get to open the door to the majesty of “secondary cuts” that can benefit from much slower cooking than consumer kitchen appliances allow for. It unlocks a world of possibilities, flavours and textures previously only available at good restaurants.
It also makes kitchen workflow much easier. For perfect food in a frying pan you have ±60 seconds leeway. In a water bath, you can let your food sit around for another 60 minutes if you need to do something else. It makes entertaining for groups much, much easier.
There are more and more consumer sous vides every month. You may have already seen the polished Sous Vide Supreme (starting at around £250). There are also newer similar fixed bath units one from Andrew James currently £99.99 and the other from VonShef for £91.99. These fixed bath units have one thing in common: they take up significant amounts of space and you’re limited to the size of the bath.
This is why mine is better. It’s easy to throw in a draw and the bath size is limited only by the size of the pot you want to use. It can be anything from a small saucepan through to a 40l+ commercial stock pot.
Kickstarter has hosted more than a couple of submersible heating circulators like the Nomiku, Anova and Sansaire and while they’re cheaper than the top-end baths, they’re still around $250 and with no indication on UK availability or pricing.
Still too expensive? What about £23.37 (plus tools)?
Here are the ingredients for my 15-month battle-tested sous vide. The links are to the the exact items as I ordered them. There may be cheaper available. Most of these items are available with Prime delivery but at twice the price (typical).
The components linked below are for a UK build using 220-240V AC. Other count. Other EU residents will be able to mostly copy this (you’ll just want a different extension and hotplate). US residents will need to change to a 110V AC STC-1000 and 110V hotplate too.
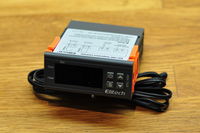
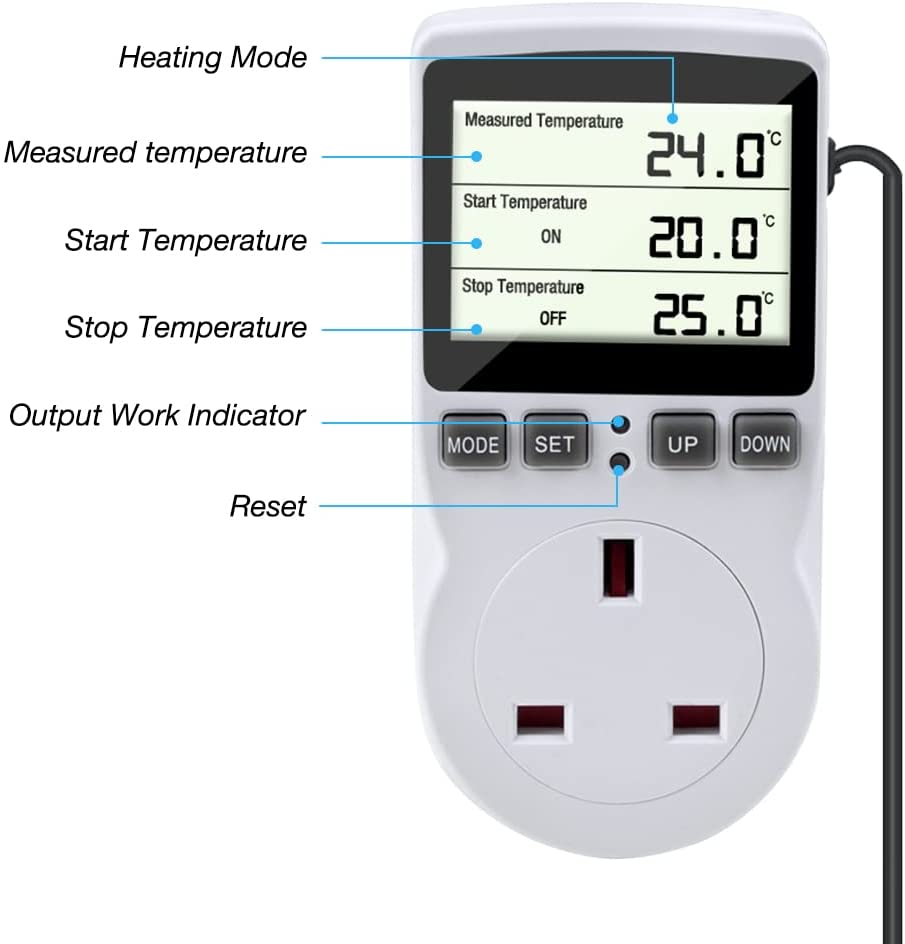
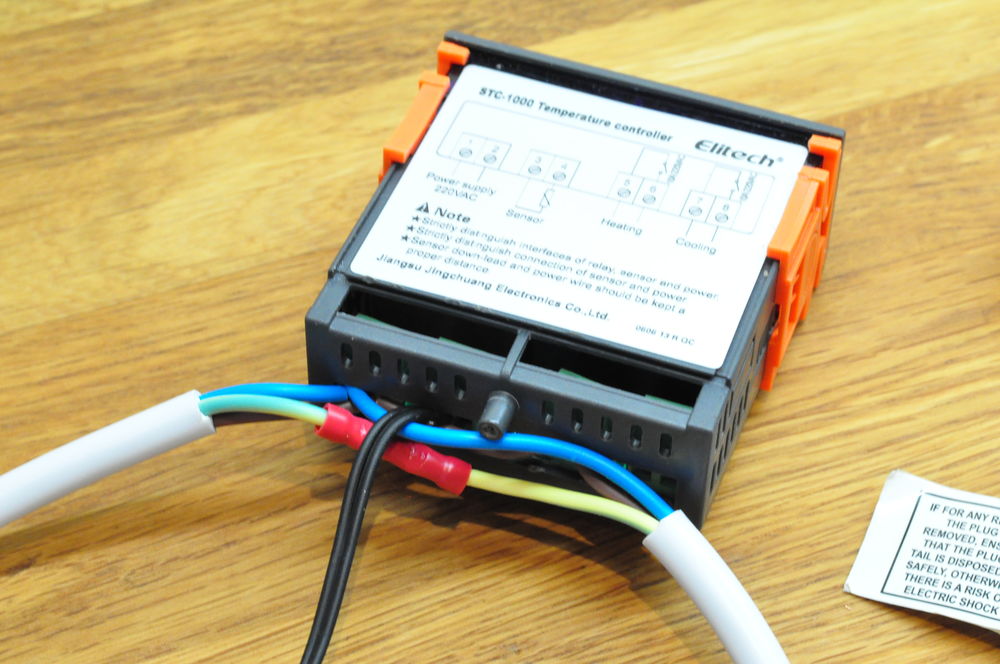
Elitech STC-1000
This is the most important bit. The one I’m linking to is the one I used which was completely different from the pictures on Amazon. Nevertheless, its reviews are all still positive and it’s a steal at £8.77.
What complicates things is that there are a number of clones that all look exactly the same at the front but have different configurations of relays and wiring at the back. I have included a wiring diagram later on so if yours comes and it’s different, do not follow my wiring instructions. Reconfigure or ask for help.
The hackers out there might be wondering why we’re taking the easy route here. Why are we relying on a silly aquarium controller when we could use a Raspberry Pi, an Arduino or even a full Ubuntu desktop? Well you can, but between the relay and the thermometer, you’ve probably already spent more than £8.77…
Single-gang, 13A extension
You could skip one altogether and hardwire your hotplate into the controller but I think for just £5.70, you’ll appreciate the flexibility this gives you. Don’t cheap out and get anything less than than one rated for 13A though.
I would also avoid multi-gang extensions as you’ll only be tempted to plug something else in there and that could overload the 10A relays in the STC-1000.
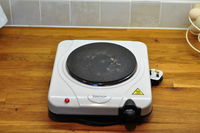
1500W single hotplate
Don’t go overboard here. The relays are rated for 10A@220VAC. That’s the bottleneck so don’t get a massive induction hotplate. This one for £8.90 £22 (urgh inflation) is more than enough.
As you’ll find out eventually, if you only ever cook in 10 litres of water or less, you could probably get by with something much wussier. My hotplate rarely goes above its #2 setting (that’s 2 of 6). More on this later.
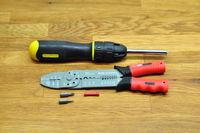
Tools (that you probably already own)
For this you’ll need screwdrivers in size 0 Phillips and size 3 flat, and a crimp and some crimping pliers and some wire-strippers. My crimping pliers are also strippers.
The pictured screwdrivers are just my favourites. I bought a crimping kit which came with a couple of screwdrivers. It’s currently £16.50 so you can probably get much cheaper alternatives at your local DIY shop.
How to wire up the STC-1000
ELECTRICITY WARNING! A basic minimum understanding and respect for electricity is required to safely proceed. If you’re not fit or technically able enough to do this, don’t follow this tutorial. Get an able friend to build one for you or ask somebody to mentor you through it and watch you work.
Anyway, we’re aiming for something like the following diagram. The big grey box is the STC-1000 as if you were looking at the back of it with its cover removed. There should be a wiring diagram on top of the unit. If that looks significantly at odds with mine, either adjust, ask for help, or get a different controller.

Brown is live, blue is neutral and green is earth. We’re going to daisy-chain the device live (#2) to the relay input (#5) and merge the socket neutral into the device neutral (#1). We could do this on an external terminal block (or using these fancy Wago three-way terminals) but there’s just about enough room for two 2.5mm 13A cables in the back of these terminals.
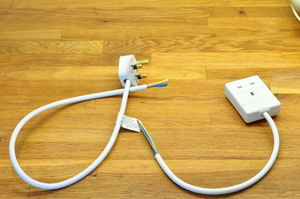
We’ll start by cutting the extension cord in half and stripping the white, outer flex from the cable. From the male plug end we want to remove ~50mm (it can be less but it gets more fiddly) and from the female socket end, about three times that. Be really careful when you’re doing this. If you cut through the internal core insulation, you’ll want to cut it all back and strip further up the wire. You can only make that mistake a certain number of times before you need a new extension.
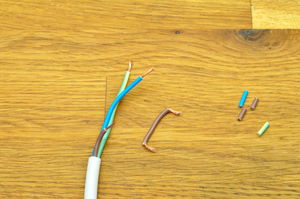
Strip the ends of the plug end by around ~6mm, and strip the socket ends. DO NOT TWIST THE ENDS YET!
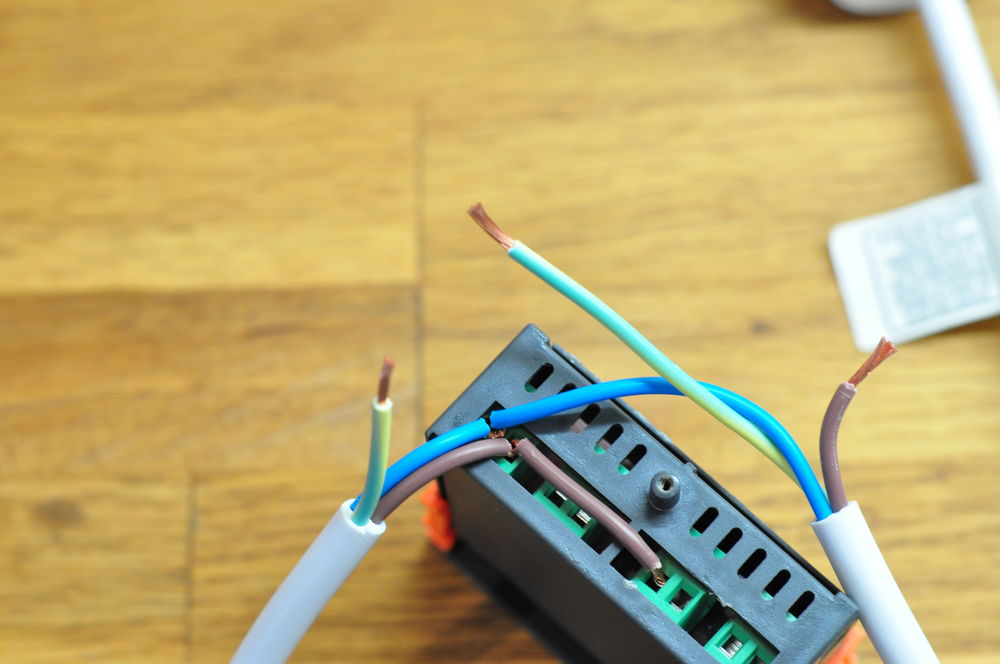
We’re going to need a jumper to go between #2 and #5 to feed the relay power. Cut a good 100mm from the long socket end live wire. Use your own discretion. Make sure it will effectively bridge the two terminals. Strip the two new cut ends too.
You should have something like this photo.

Take the live of your plug end and your bridge piece and twist them together (like this) and then put the joined cable in #2. Tighten the terminal. Then twist up the other end of the bridge and secure that in #5.
Take both neutral wires and twist them together and secure them in #1. Like this.
Finally your earth might seem too long so you can trim from the socket end and crimp it onto the shorter plug end. There’s no earth on the STC-1000 but if you’re putting this in a metal case, I would suggest earthing that into your crimp.
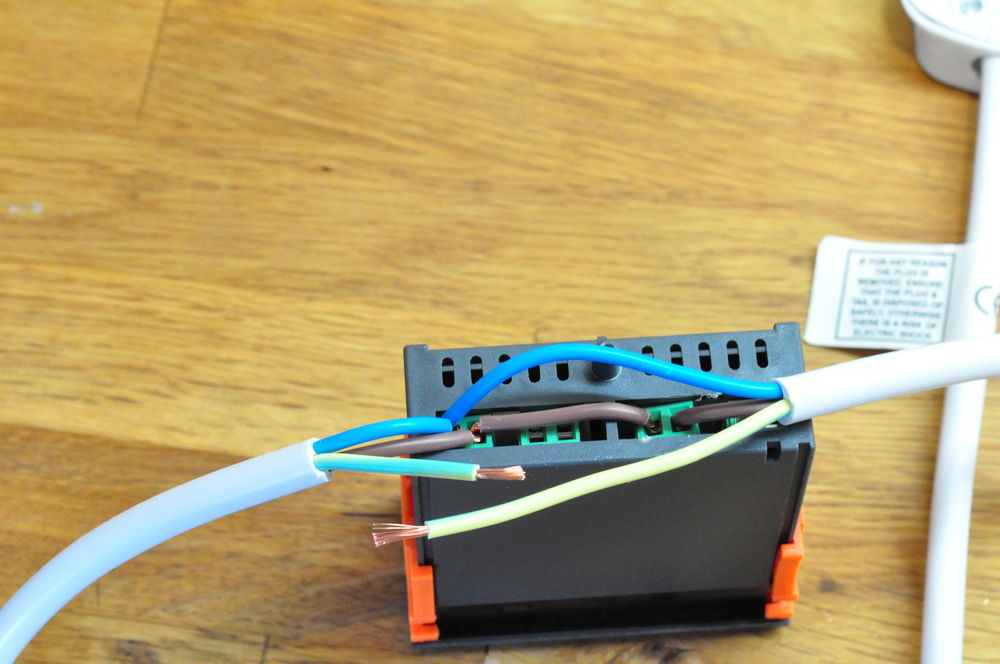
This is what the back of your STC-1000 should look like now.
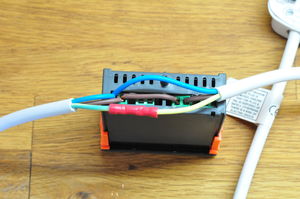
Now we just need to wire in the sensor to #3&4 and put the rear protector on. Now you have a fully wired STC-1000.
Now this shouldn’t come anywhere near any water but if you wanted to further insulate the STC-1000 and your wiring, now a good time. You can buy all sorts of electrical and hobby boxes. I’ve skipped this step (mainly because it’s a load of extra expense and hassle) but if you want a professional looking unit, here’s your chance.
Calibrating your setup
You don’t want to throw a £20 bit of meat in this thing yet. There are a number of factors that can mean the temperature set in the STC-1000 isn’t the temperature your food is going to spend most of its time at. It’ll probably be hotter so while it’s probably not going to kill you, it does mean your food might not be as tender as you’d hoped for.
These factors are especially important for extra-long cooks.
The fix for all of this is simple enough. You just need to test your machine in the setup you’re going to cook with. In our case we almost always use a 10l stock-pot. It’s fairly thin which amongst other things, means it doesn’t store up heat too much. Le Creusets are nice but their heat distribution properties can introduce a lag between the hotplate generating enough heat and it reaching the sensor.
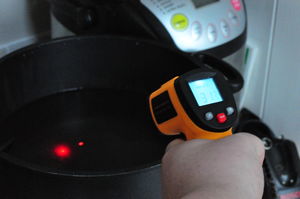
Get a good, quick-to-read thermometer, fill your pot to the level you’d cook with, dangle the sensor into the middle of the water and test things out.
The STC-1000 supports sensor calibration through its menu system so with the hotplate unplugged just compare the sensor’s reading to that of the thermometer. Adjust your STC-1000 until accurate.
Now for heat-tests. Does the water get too hot, too fast? Or never hot enough? Tune the hotplate’s heat setting. I have mine set on 2-of-6 in order to keep ~8l of water @ 63.5°C (for perfect chicken).
Cooking in a sous vide… Hang on, where’s the vide?
The more astute amongst you will have noticed that sous vide literally translates as under vacuum. We’ve made a water bath but still need something to seal your food so that everything at the start of the cook is still there at the end of the cook.
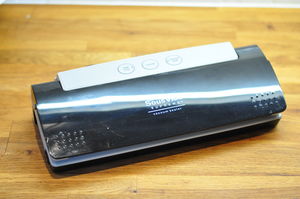
You have a few options here, but the best performing is probably a external vacuum sealer. I have a Sous Vide Supreme branded one. You put your food in channelled bags, put one end in the machine and it sucks the air out before sealing it. They’re not good for sealing liquids because the liquids are sucked up through the bag’s channels.
A chamber vacuum sealer removes as much air from the entire chamber (including the open bag) before sealing the bag shut and returning the pressure. These are furiously expensive and noisy machines that take up tons of space but they will give you the very best outcome and work perfectly fine with liquids. You can also use the for degassing liquids (for clear gels, etc).
There are other options like the ThriftyVac or the “submersion technique” but these offer lower or no vacuum and you need to be really careful about what plastic you use. Many food bags are unsuitable for heating. Using cheap plastic bags can result in a lovely petrochemical and plasticiser infusion. Nobody wants that.
Perhaps the cheapest option is finding a good butcher. You should do that anyway. Ours is more than happy to season and chamber-vac-seal meat bought from them. This is definitely worth a shot before you buy more machinery to do this. Get a nice big steak get them to pepper it and seal it up for you.
What temperature and how long?
So you’ve got some meat and it’s been sealed up. Now you need to set your STC-1000 to the correct temperature. The Sous Vide Supreme cooking recommendations give a good idea about safe cooking temperatures and durations. Print out the PDF and stick it on your kitchen wall.
But that’s it. Now it’s over to you. I am somebody who likes to experiment but I would strongly suggest cooking by numbers to begin with. Use others’ temperatures and durations. Once you’ve had a few perfect steaks, you can stretch yourself. Try some 72-hour beef ribs, or perhaps a cardiac-arresting 36-hour porchetta.
If you adore cookbooks, check the reviews before you buy one on sous vide. Some of them seem more like photo albums than instructional guides. As ever, there are some great free websites for inspiration and recipes:
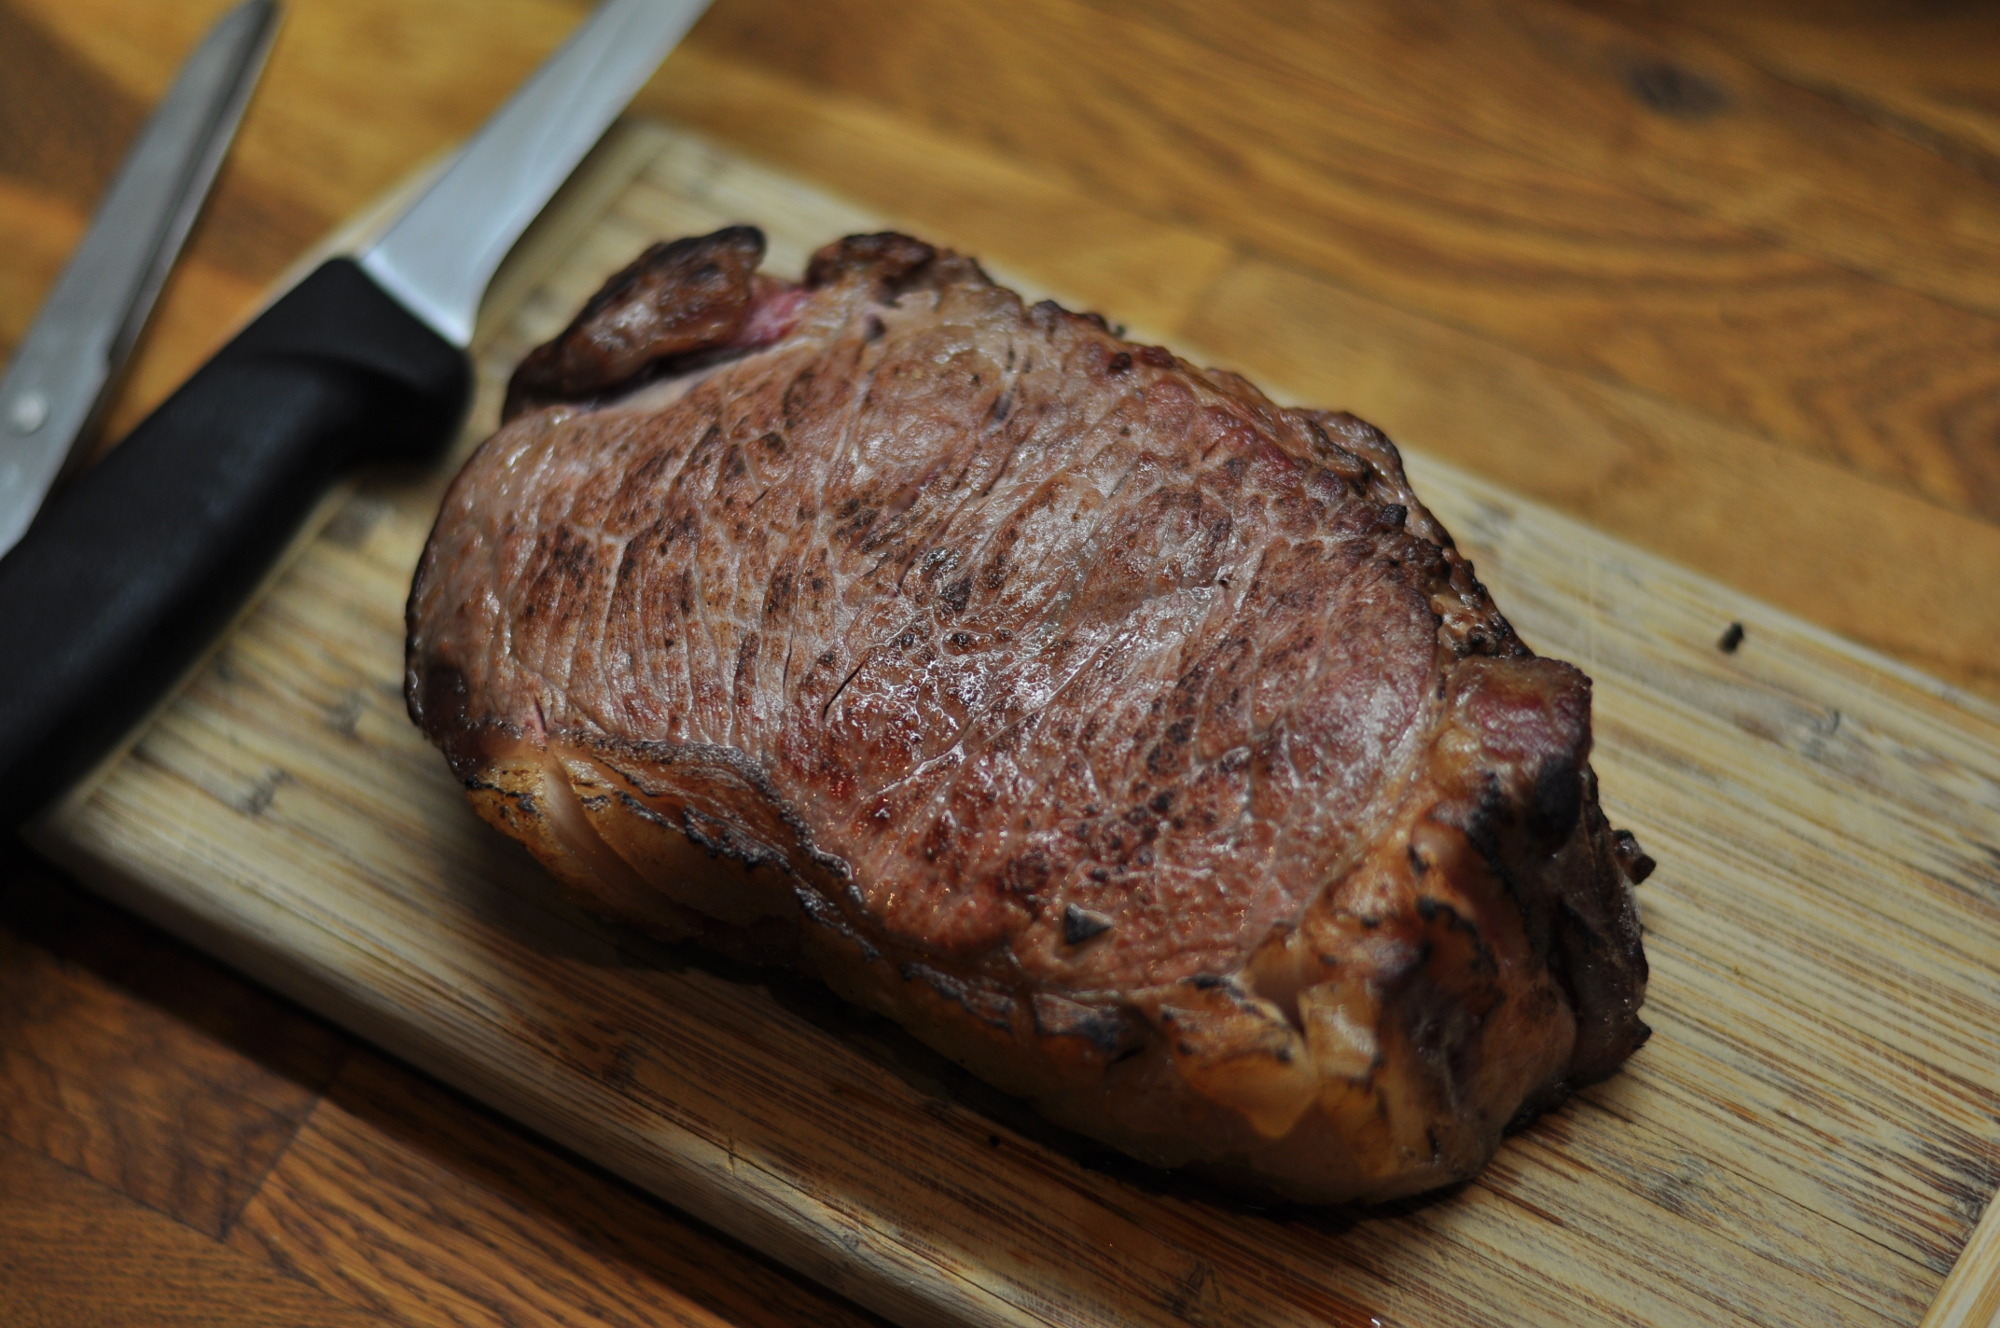
I’m going to leave you with a picture of tonight’s dinner but if you’ve got any questions or comments, just let me know. That includes great recipes. I always like to try something new.